Tuesday, April 10, 2018

More on SP Rattle Can Box Car/Freight Car Red


I still have one more Box Car Red rattle can to try. Unfortunately the Scalecoat II Oxide Red Primer can I have on special order has not yet arrived at my local hobby shop.  It probably has to come ground freight from the east coast to California so it may take a while.
In the meantime I have what I think may be the winner already.  The color I am aiming for is the SP Freight Car Red used by both PFE and SP. There are two measures of "closeness" to this color I am using. The first sample is a comparison with on page 419 of Tony Thompson's massive PFE book (2nd Ed.) where there is a drift sample reproduced as accurately as possible for printing.   The other is PBL' s Star Brand SP/UP Freight Car Red which I have airbrushed in the past on a model I use for comparison.  There is a long discussion of SP paint colors at http://modelingthesp.com/Prototype_Equipment/S.P._Paint.html. 
And the winner is Tamiya Fine Surface Primer Oxide Red, Item # 87160-800. Again it is not quite an exact match but given all the variables it is close enough for my personal Rule 1. (This was not a scientific method study.)
PFE Book Drift and Tamiya Oxide Red Primer
PBL Star Brand SP/UP Freight Car Red and Tamiya Oxide Red Primer (the B-50-25 from an Andy Carlson/IM kit was air brushed with the SB paint when I could still use an airbrush)
And the Tamiya Surface Primer can go on in one coat. It is fine enough that I think a second would still not obscure details
Again your rattle can painting results may not be the same as mine. But I think I may have solved my rattle can source to replace an air brush problem. For the one or two cars a month I might paint FCR it will do even on expensive resin kits. And I only have to clean the spray cap in a very small bottle of Tamiya thinner after spraying.
I plan to show the full comparison of colors I tried when the Scalecoat II primer arrives. I still haven't tried the Preval sprayer. I may try it with some Vallejo Air acrylic "rust" sold as BCR by Micro Mark that I bought a couple of years ago.
I plan to try the Tamiya primer on a less expensive kit than the Westerfield B-50-15 I am building. 
I will also have to search for a rattle can solution for "daylight" orange used on PFE car sides and the SP dark olive for arch roof and heavyweight passenger equipment.
October 2025 Postscript: It appears that Tamiya either no longer makes the Oxide Surface Primer or it is no longer available in the US. It was not in the Tamiya product list last I checked. 


Wednesday, March 21, 2018

Search for the Elusive Rattle Can Box Car Red

I have been searching for a "rattle can" box car red (BCR) that closely matches Star Brand STR-30 SP/UP Freight Car Red. This past week I came across a color that was new to me Tamiya TS-33 Dull Red and thought I would try it out.

(Note that for many reasons, I can no longer use my garage even on a nice day for setting up my airbrush. I can use my deck when it is not raining or too windy but I live on a hillside and the gusty wind can be constant for days.  Besides I am tired of all the setup and cleanup required for using the airbrush. Painting is always a necessary step but not really an enjoyable part of my model building.)

Alas the TS-33 is a little too pink and not enough brown. I had hoped to use a Tamiya Rattle Can color as they are a finer grade of paint and nozzle than the hardware store Mineral Red spray cans. 

This is the result:


The photo shows a comparison to SP B-50-25 (Andy Carlson IM parts kitbash) and SP F-70-10 (SPH&TS kit) both painted with Star Brand STR-30 SP/UP Freight Car Red.

I will find a use for the TS-33 Dull Red. BCR weathers almost immediately a car leaves the paint shop. As a base for a car that will be weathered it might do well. 

And the search goes on. 

For those of you who might wonder at the few posts on this media, I am the owner and moderator of https://plasticfreightcarbuiilders.groups.io on the groups.io platform where many former Yahoo Groups have fled. At the moment I am, however, building a Westerfield resin kit for an SP B-50-15. There is a another lively group at https://resinfreightcarbuilders.groups.io. Most of my recent kit building has been with injection molded plastic kits or modifications to RTR or Blue Box kits.

Suggestions for other fine rattle can solutions are always welcome.


Saturday, January 13, 2018

SC-44 Charger time.

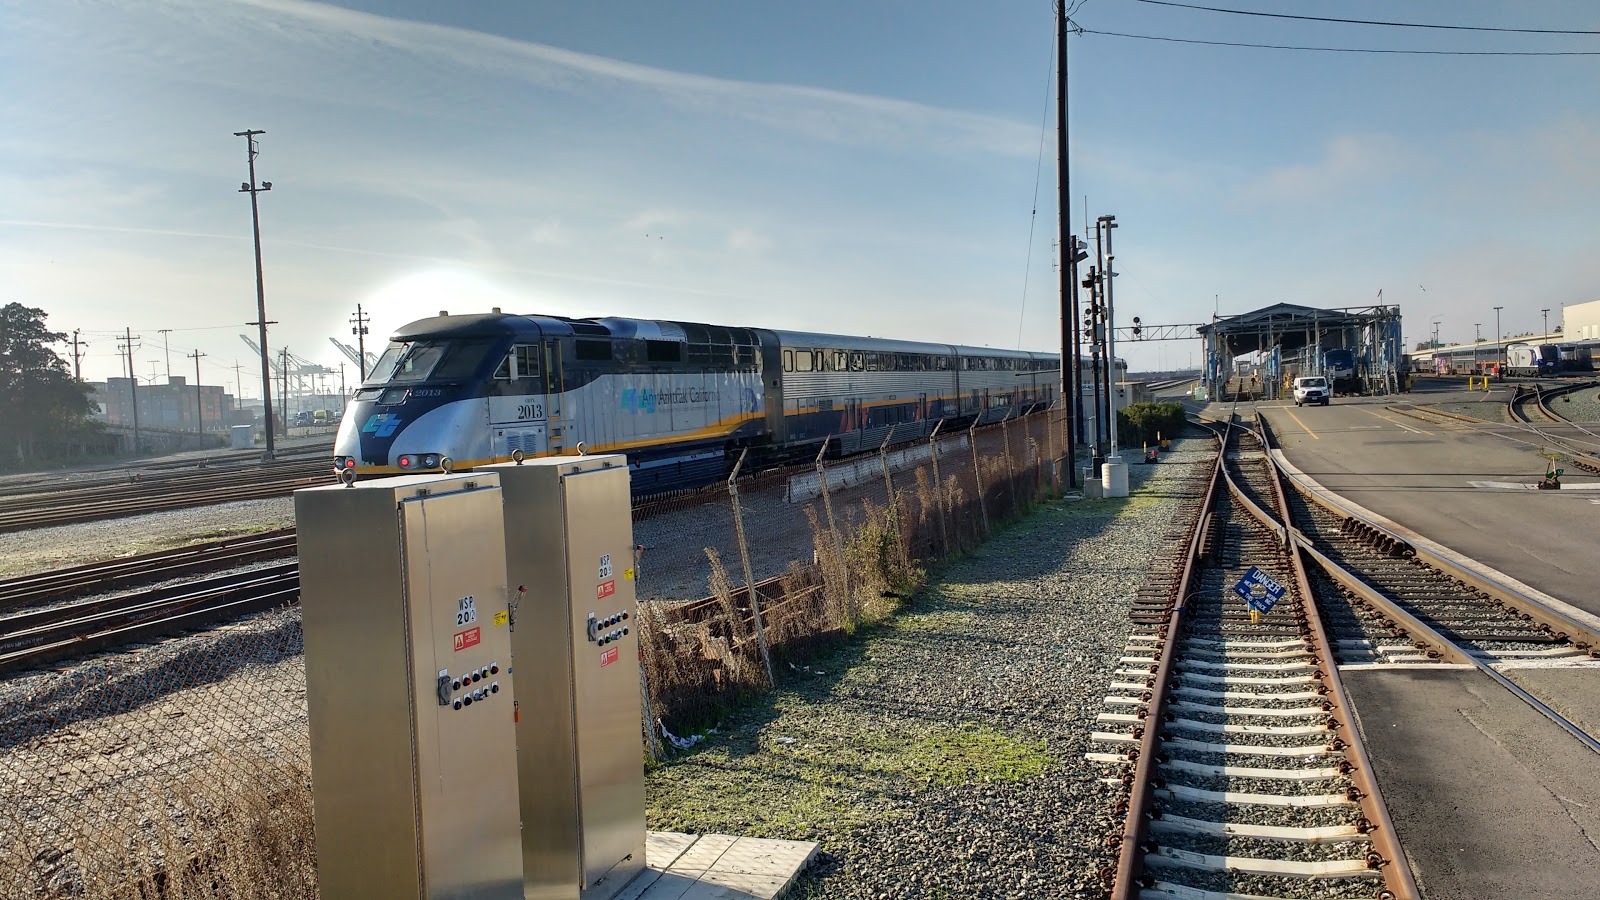
Somehow I have become a bit enamored of these ultra modern beasts. Yesterday I was helping the Redwood Empire provision the car (ex Santa Fe Business car #33) when I observed a lot of SC-44 activity as they are now in operational service.

Standing on the observation platform of the Redwood Empire I snapped a few pix of the SC-44's moving in and out of the maintenance area where they are serviced between runs on Capitols and San Joaquin trains. Note that the whole train is serviced together


Tuesday, October 10, 2017

A little flat note

My two Owl Mountain F-50-10/12 kits are now in the projects drawer for 2018 builds. Unfortunately I tripped on a parking lot berm and fell breaking bones in my left wrist and hand and they are now in a cast for the next few weeks. The week prior to my accident I had undertaken the rebuild of an IM foobie of an SP F-50-16 that arrived from IM at my LHS on a 4-5 year backorder that I and the LHS had long forgotten. 

1. New deck from thin scribbed plastic as I could not get IM deck off without damaging rest of car. This required small strips of the scribbed plastic sheet be cut and glued to the underside along the edges to 
simulate thick deck planks. The stake pockets were respaced to closer match an F-50-16. The deck was painted with a variety of Vallejo Model Color greys to represent treated but not creosoted wood exposed to the steam era environment for several years but not heavily deteriorated.

2. Removed the tiny IM stake pockets which were not strongly attached and replaced with slightly larger Tichy stake pockets spaced to match the new deck.

3. Replaced IM virtical brake gear and wheel with larger Tichy parts. Brake wheel needed longer shaft cut from brass wire to match F-50-16 photos. Still looking for larger brake wheel. I have not replaced the incorrect K type brake layout as not visible from normal viewing angle. I don't model for contests 

4. Replaced stirrup steps with Tichy plastic angled inside steps to closer match an F-50-16. These appear to be larger than I would like but I did not have enough A Line stirrup steps in my parts stock at home,  late on a Sunday night. 

5. The IM car was painted in a shade of purple brown I would use for UK Southern Railway goods wagons but not any of my SP equipment. But the IM lettering appeared close to correct for a late 1949 F-50-16. I brush painted Vallejo 70.846 Mahogany Brown thinned with 71.061 Airbrush Thinner over the fish-belly car sides and ends. Before the paint dried I used a small micro brush whetted with the thinner to almost completely  remove as much of the brown paint as possible. It took two applications of the brown with at least an hour of drying time to adequately give the sides and ends a reddish brown tint. 


A little later note:

The first of the F-50-12's have been completed:


Thursday, August 10, 2017

OAK-BUR on the Redwood Empire 8-5-2-17

In my April 01, 2017 blog post I recounted my first trip on the Redwood Empire from Oakland to LA Union Station and beyond. Well I've done it again.

This time my friend Richard Spotswood asked me along with a few others to join him on another trip south along with some of the other owners. The Redwood Empire is due for it's every 4 year certification and some maintenance which will be performed by the Amtrak maintenance facility in Los Angeles. It has been in the Northwest, Washington, Idaho and Montana for the early summer.

There were 12 of us aboard but no chef and steward this time. We still had brunch, lunch and dinner mostly provided by Dick and ably helped by others.
Dick and I only went as far as Burbank and flew home the next day. 5 stayed on the train to LA Union Passenger Terminal.  I didn't register all the names in my long term memory so please forgive the lack of names of my fellow travelers.

This time Amtrak pushed the Redwood Empire about two miles from the private car siding in the Oakland Amtrak yard down to Oakland Jack London Square station. We waited about 20 minutes after the southbound Coast Starliner, Amtrak #11 arrived at Jack London Square for the Redwood Empire to arrive.

The Redwood Empire  approaching the Amtrak Station

 
After a lot of futzing about by the Amtrak Switching crew hooking up the head end power connection and brake line to the Coast Starlight we were about to get underway.  The weather was much nicer than in April but I did not take any usable pictures until after King City when lunch was set out.


Again I am not taking pictures like I did the first time. This next shot is coming down Cuesta grade north of San Luis Obispo. The railroad crests the grade at 1380 feet in a tunnel and in the next few miles curves in several horseshoe turns and tunnels to drop to 240 feet in elevation at San Luis Obisbo station.
This is from the inside of the lounge area which looks like the following pic seen going through one of the tunnels
We arrived about 1 hour behind schedule at San Luis Obispo.

South of San Luis Obispo we went through Pismo Beach, the beet country around Betteravia and Guadalupe, the station for Santa Maria. The line then goes where there are few roads out to the coast and skirts the Pacific on bluffs above the ocean with Vandenberg Air Force Base on the left. It was foggy in this section so we could not see much but I did spot a tall launch preparation building with a large SpaceX logo but to late to get a picture. 
Along the hidden coast south of Surf it is a wild country still bordering Vandenberg AFB. 
If you click on this and enlarge it you can see a large storage tank facility that has a SpaceX logo. Rocket Fuel? 
Finally the fog cleared.

After many miles we crossed Gaviota trestle where Highway 101 comes out to the coast finally. 

From here the route parallels 101 until Oxnard


In Ventura we were right by the Ventura County fair. Lots of people wave to you when you are on the back observation platform. It is cool to acknowledge them and wave back.


Finally it was dinner time as we sped through Oxnard
 After dinner we hastily prepared to get off the Redwood Empire at Burbank
This shows the train leaving Burbank with the folks who were riding on to LA Union Station. A couple of the owners will be staying with the car through the inspection and maintenance.

As Porky Pig used to end all Warner Bros. Cartoons:
THAAAATS ALL FOLKS


Monday, July 17, 2017

New Workbench Tools and PFE R-40-14

I had wanted a small glass plate for cutting and assembly but couldn't find anything at craft or art supply stores and the only hardware building supply stores that sell retail in the I-680 corridor appear to be the big box stores. Fortunately I ran across very flat surface glass tiles on Amazon and for $19.95 purchased a box of 5. The only way they come.  The tiles are 3 " x 3" and appear to have a very flat surface.  Also on the right is a mouse wrist rest that I use to steady my shaky hand for cutting and detail painting.

This is my workbench showing the new tiles and my current project a PFE R-40-14 ice car.


The R-40-14 is a rebuild of an Athearn blue box 40' steel ice car. I managed to find a package of the long discontinued Details West W Post (rounded) 4-4 dreadnought ends. for this project. Ladders are Tichy Reefer ladders. Hand grabs are Kadee.  Ice hatches are the Details West Equipco hatches that are also hard to find. The trucks are just Tichy Bettendorfs with metal wheel sets. Kadee 158 couplers have been mounted.

I didn't get too far with underframe detailing.  I had closely been checking Dick Harley's detail photos of a PFE R-40-23 specifically the placement of the train line, air reservoir, brake cylinder and triple valve. This is different from most diagrams that come with HO AB sets. I used the Athearn underframe with the coupler boxes cut off and a thin fake floor cut from Evergreen scribbed plastic sheet. The brake parts are from a Details West AB set. The Athearn steel weight was mounted inside the car with canopy cement and a pair of heavy styrene strips to keep it in place.

I started to airbrush with Star Brand Daylight Orange. But my airbrush clogged 3 times on that paint and I finally concluded it was no longer a good bottle. So I fell back on my earlier experiment with hand brushing Vallejo Model Color using a mix of three drops 70.911 Light Orange and 1 drop 70.927 Dark Flesh. It took several coats as I had primed the body with a Tamiya light grey. I was careful not to build up any thickness around details.  After that it was clear coated for decals.

I started to decal with a newer Microscale 87-414 but found it difficult to get the right build and repack data from that sheet and an 87-501 sheet for a 1941 built R-40-14 still with the black iron parts and single herald medallions in 1950-53. Then after finishing one side, I discovered Ted Culotta at Speedwich Media has issued a set just for the R-40-15. Last Thursday (7/13/17) I ordered a two sets and am anxiously awaiting a packet in the mail so I can complete the decaling.

I should probably take a break from my PFE reefer madness again after this car.  My Intermountain pre-orders for R-40-23's have been delayed until 4th quarter. Red Caboose pre-orders for R-30-xx wood ice cars are now in the unknown. eBay prices are sensitive to this and are going up accordingly.

And I have an old Silver Streak wood Bay Window 1953 rebuild that was stuck together with Walther's goo back in the 1970's and has been de-kitted. I will have to build new plastic sides from scribbed sheet and an new roof, floor and underframe. Only the cast bay windows and caboose ends will actually be reused. Rebuilding costs are so extensive they will have to be charged to the capital accounts rather than expended. (Old accountants think about these things.)

This is the final result of the R-40-14 rebuild. Photo resolution was not good this time.  I used Ted Culotta's Speedwich decal set for the R-40-14 on the UP side. I found these were available after I had already done the SP side from the Microscale 87-414 set The PFE orange is a little light this time but with the remembered range of colors depending on the light. 
I won't be able to do any more R-40-14's as I have no more of the old Details West 4+4 rib castings with W post rounded corners. I have some R-40-10 end castings that I may be able to sand a little to look like a W end post which would allow another R-40-14 bash from an Athearn reefer.


Ken Adams

Tuesday, June 27, 2017

A Modular Philosophy for the Future

My current layout design philosophy is to build multiple lightweight 2 x 4 foot and 2 x 6 foot modules that can be taken apart and stored as needed as they will have to share my current or future downsized living space. 

My current decrepit layout is a 2 x 11 foot Celotex "board" 20 year old "test" track that is supported on TV tray tables and 1 inch X 2 inch supporting boards.  This is in dire need of replacement.  

I currently plan (maybe it is just a dream) to build three separate sets of modules:


  • A UK based representation (as is my current 2 x 11) of  the North Cornwall Padstow/Padstein UK terminal. I will have to add a removable extension for the long clay loading dock sheltering the fishing dock. This is 4 mm scale with HO track and frozen in time in the summer of 1947 before nationalization. I am awaiting new bullhead rail points/switches/turnouts from Peco that should start appearing later this year to begin. Connection with the two US modules would be intermittent and require renegotiation of  a dubious postwar lend lease arrangement.


  • A representation of the Walnut Creek SP Depot area on the San Ramon valley branch line 1947-54 with it's simple track plan. This is planned as a stage for detailed scratch built structures. The central structure, the 1890's depot and freight house building has been mocked to scale up from mat-board.  This depot is really a train order station as passenger service was discontinued by 1920. Rail fan excursions are allowed and will give me a reason to run Harriman style coaches. Even SP #10 the 1954 Rail Diesel Car will be allowed in excursion service.


  • A PFE Icing Dock about 1950-1954 centered series of modules with packing plants as the backdrop.  I have an strong interest in PFE ice cars and this module would allow display of my growing collection of kit, kitbash and RTR PFE cars. This may or may not connect to Walnut creek which in my modeling era had little or no reefer traffic originating, as a destination or through traffic.
In addition I would need staging/fiddle yard modules to allow operation.

I have not had much luck using the available free layout design software packages so no proposed track plans are currently available.